
How to Organize Your Kitchen Pantry Like a Pro
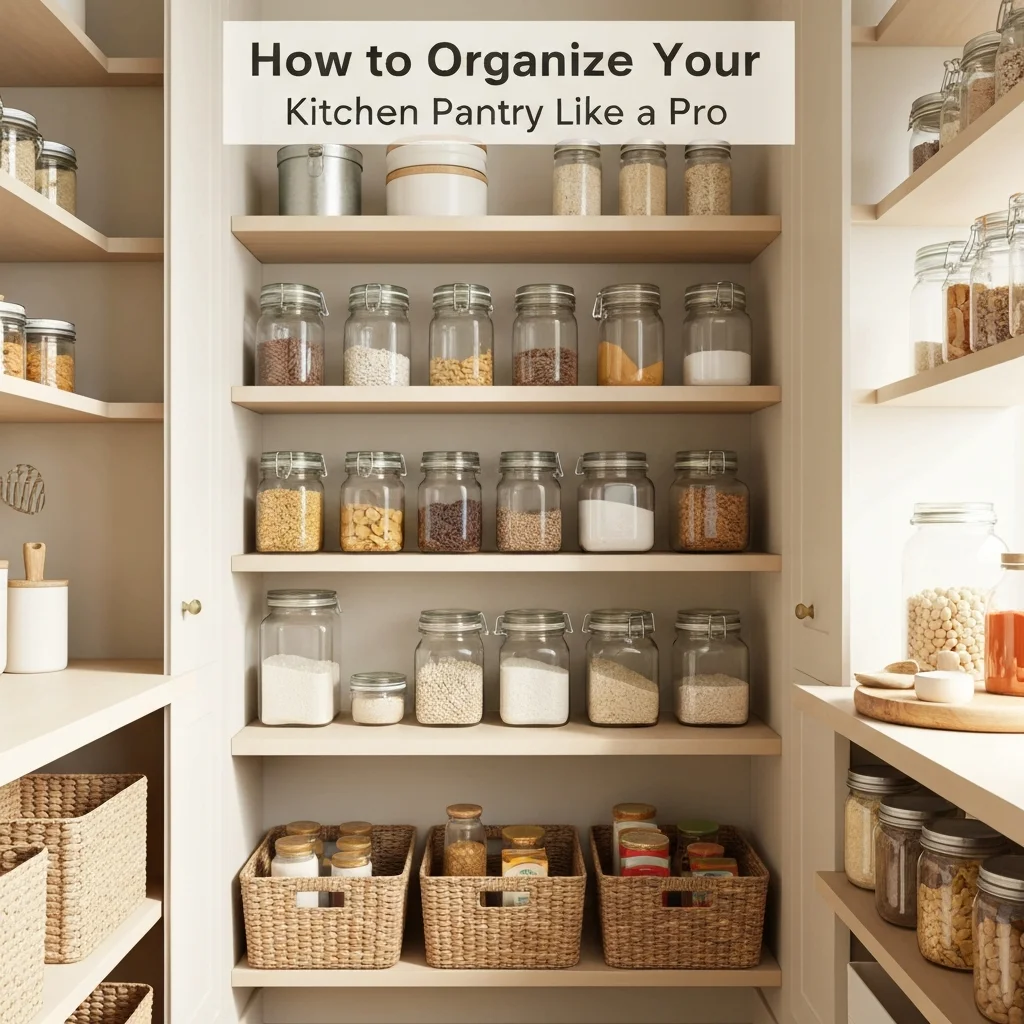
A well-organized pantry is the secret weapon of every efficient home cook. It saves you time, prevents food waste, and makes meal prep feel effortless. But let’s be honest—keeping that small space tidy can feel like a constant battle.
The good news? You don’t need a custom renovation to organize your kitchen pantry like a pro. With a few smart strategies and the right tools, you can transform that cluttered chaos into a functional, beautiful space. Here’s exactly how to do it, step by step.
Why a Pro-Level Pantry Organizer Matters for Your Home
An organized pantry is more than just pretty shelves. It directly impacts your daily routine. When you can see every can, box, and spice at a glance, you cook faster, waste less, and actually enjoy using your groceries.
Plus, proper pantry organization reduces stress. No more buying duplicates of items you already own or digging through piles to find a single ingredient. It’s a small change that creates a huge shift in how your kitchen functions.
Step 1: Empty the Entire Pantry and Declutter Ruthlessly
You can’t organize what you don’t see. Start by pulling absolutely everything out. Lay it all on your counter or dining table. This is your moment to face reality.
Check every expiration date. Toss anything stale, expired, or that you know you’ll never use. Be honest—if that exotic vinegar has been sitting untouched for three years, let it go. To truly declutter your pantry, use these four simple categories:
- Keep: Items you regularly use and love.
- Donate: Unopened, non-perishable foods you won’t eat.
- Trash: Expired, stale, or damaged goods.
- Relocate: Things that belong in another cabinet (snacks, small appliances).
Wipe down every shelf with a mild cleaner while the pantry is empty. Starting with a clean slate makes the process feel fresh and intentional.
Step 2: Create Zones for a Functional Flow
Professional organizers swear by zoning. Group similar items together so your brain knows exactly where to look. Think of your pantry like a grocery store—everything has its aisle.
Here’s a proven zone system you can adapt to your own pantry:
| Zone | What Goes Here |
|---|---|
| Breakfast & Baking | Cereal, oatmeal, pancake mix, flour, sugar, extracts |
| Canned & Jarred Goods | Tomatoes, beans, broths, pickles, sauces |
| Pasta & Grains | Rice, pasta, quinoa, couscous, lentils |
| Snacks & On-the-Go | Chips, granola bars, nuts, dried fruit, crackers |
| Cooking Essentials | Oils, vinegars, spices, stock cubes, condiments |
Keep the most-used zones (snacks, breakfast) at eye level. Store less frequently accessed items like extra bulk supplies on higher or lower shelves.
Step 3: Invest in Clear Pantry Containers
This is the single biggest visual upgrade you can make. Transfer dry goods like pasta, cereal, flour, and sugar into airtight, clear containers. Not only do they look uniform and clean, but they also keep food fresh longer.
Clear containers allow you to see exactly how much you have left at a glance. No more guessing if there’s enough rice for dinner. Label everything—even if you think you’ll remember. A simple label maker or chalkboard stickers work beautifully.
Using matching containers is one of the most effective kitchen storage solutions for creating that cohesive, pro look. It instantly elevates the feel of your entire pantry.
Step 4: Use Vertical Space and Shelf Risers
Most pantries have wasted vertical space between shelves. Don’t let it sit empty. Stackable shelf risers let you store cans and jars on two levels, doubling your usable area.
Consider adding adhesive hooks to the inside of your pantry door for measuring spoons, oven mitts, or small bags of chips. Over-the-door wire racks are perfect for spices, condiments, or extra snacks. To truly maximize pantry space, think upward first.
Pro tip: Place taller items like olive oil bottles or cereal boxes in the back or on the bottom shelf. Keep shorter items forward so nothing gets hidden.
Step 5: Group Like Items with Lazy Susans and Bins
Lazy Susans are a game-changer for deep corners. Use them for oils, vinegars, sauces, or spice jars. A simple spin brings everything within reach. No more reaching blindly to the back of the shelf.
Group small items like packets of seasoning, instant oatmeal, or tea bags in clear bins or baskets. This keeps them contained and prevents a cascade of tiny boxes every time you open the door. Label each bin for easy retrieval.
Bins also help maintain the system long-term. When you buy new groceries, just toss them into the correct bin. No guesswork required.
Step 6: Maintain the System with a Weekly Reset
Even the best pantry needs a little love. Dedicate five minutes each week to a quick reset. Fluff the bins, rotate older items to the front, and wipe down any sticky spots.
Make a habit of taking a “pantry inventory” before you go grocery shopping. This prevents overbuying and ensures you use what you already have. A simple note on your phone works perfectly.
Remember, the goal isn’t perfection. It’s function. A system that works for your family’s lifestyle will stick. If something isn’t working, adjust it. The best pantry organization tips are the ones you actually follow.
Frequently Asked Questions (FAQ)
How often should I organize my kitchen pantry?
A full deep-organization session is best done once or twice a year. But a quick weekly reset (5-10 minutes) will keep it functional and tidy between major overhauls.
What are the best containers for pantry organization?
Look for airtight, BPA-free clear containers. Rectangular shapes stack more efficiently than round ones. Glass is durable and easy to clean, but high-quality plastic is lighter and less expensive.
Should I organize my pantry by food type or by frequency of use?
Ideally, combine both. Group by food type (pasta, snacks, baking) for logical flow, then place your most-used items at eye level for convenience. Less-used items can go higher or lower.
Do I need to buy expensive organizers?
Not at all. Start with what you have—reuse jars, shoe boxes, or baskets. Invest in a few key items like clear containers and shelf risers as your budget allows. The method matters more than the gear.
How do I organize a very small pantry?
Focus on vertical space with stackable shelves and door-mounted racks. Use narrow bins for slender items. Keep only essentials and relocate overflow to a secondary storage area if possible. Every inch counts.
What should I do with spices in my pantry?
Spices are best stored in a dedicated drawer, a tiered spice rack, or on a small lazy Susan. Keep them away from heat and direct light. Label lids clearly for quick grabbing during cooking.
How do I keep my pantry organized with kids at home?
Designate a low shelf or bin specifically for kid-friendly snacks. Use clear, easy-to-open containers. Teach them to put things back in the correct zone. A simple system they can understand will stick.
Can I organize my pantry without emptying it completely?
Technically yes, but it’s much harder and less effective. Emptying everything forces you to declutter and clean. It also gives you a clear picture of what you actually have. The upfront effort pays off big time.
Conclusion
Learning how to organize your kitchen pantry like a pro doesn’t require a massive budget or endless free time. It requires a clear plan, a bit of discipline, and the right mindset. By decluttering first, creating zones, using clear containers, and maximizing every inch of space, you’ll build a system that works for you—not against you.
The result is a pantry that sparks joy every time you open the door. You’ll save money by using what you have, save time by finding everything instantly, and feel a sense of calm in the heart of your home. Start with one shelf today, and watch the transformation unfold.


